
Why the Foam Roller Is the Best Posture Tool
The foam roller is the single most useful posture tool you can own. Not because it rolls out knots or relieves soreness, though it does both. It is useful because it can mobilize the thoracic spine in ways that almost no other tool can.
The thoracic spine is the bottleneck of posture. It is the region between the shoulder blades that locks into flexion from years of sitting and screen use. When the thoracic spine cannot extend, the shoulders round forward, the head pushes forward, and the entire upper body collapses into a slouched position.
A foam roller placed under the thoracic spine creates a fulcrum that allows the thoracic segments to open into extension. No stretching exercise replicates this as effectively. No amount of "sitting up straighter" unlocks a thoracic spine that is structurally restricted.
The 5 Exercises
These five exercises use the foam roller as a corrective posture tool, not a massage device. Together they take about 5 minutes and address the key restrictions that drive rounded, forward posture.
1. Thoracic Extension Over the Roller
This is the single most important foam roller exercise for posture. It directly mobilizes the thoracic segments that lock into flexion.
Setup: Place the roller horizontally across your upper back, roughly at the bottom of your shoulder blades. Knees bent, feet flat on the floor. Support the back of your head with your hands (fingers interlaced) to protect the cervical spine.
Movement: Slowly extend backward over the roller, letting the thoracic spine open around it. You should feel a stretch across the front of the chest and a gentle mobilization in the upper back. Do not force the range. Hold the extended position for 3 to 5 seconds, then return to neutral.
Reps: 10 to 12 repetitions, moving the roller up one vertebra between sets to mobilize multiple segments.
Key point: Do not roll up and down like a massage. This is a mobilization, not a rollout. Each position is held and extended through. The thoracic extension exercise page has the full breakdown.
2. Lat Release
The latissimus dorsi connects the lower back to the upper arm. When tight, it pulls the shoulder into internal rotation and contributes to the rounded shoulder pattern. Most people never stretch their lats and are unaware of how restricted they are.
Setup: Lie on your side with the roller under your armpit, positioned against the lat muscle along the side of your rib cage. Bottom arm extended overhead on the floor.
Movement: Slowly roll from the armpit to just above the bottom of the rib cage. When you find a tender or restricted spot, stop and hold for 20 to 30 seconds. Do not just speed-roll through it.
Time: 60 to 90 seconds per side.
3. Upper Back Release (Posterior)
This is the rollout version that complements the extension work. While the thoracic extension mobilizes the joints, the upper back release addresses the soft tissue tightness in the thoracic erectors and rhomboid region.
Setup: Roller across the upper back, same position as the thoracic extension. Hands supporting the head.
Movement: Slowly roll from the base of the shoulder blades up to the top of the shoulders. Keep the hips off the floor and use your legs to control the speed and pressure.
Time: 60 to 90 seconds total.
Important: Never roll the lower back. The lumbar spine lacks rib cage protection and rolling it compresses the discs. If your lower back is tight, address it through hip flexor release instead. Read about the connection in anterior pelvic tilt fix.
4. Chest Opener (Lying Lengthwise)
This is not a rollout. It is a passive stretch that opens the chest and anterior shoulders using the roller as a support.
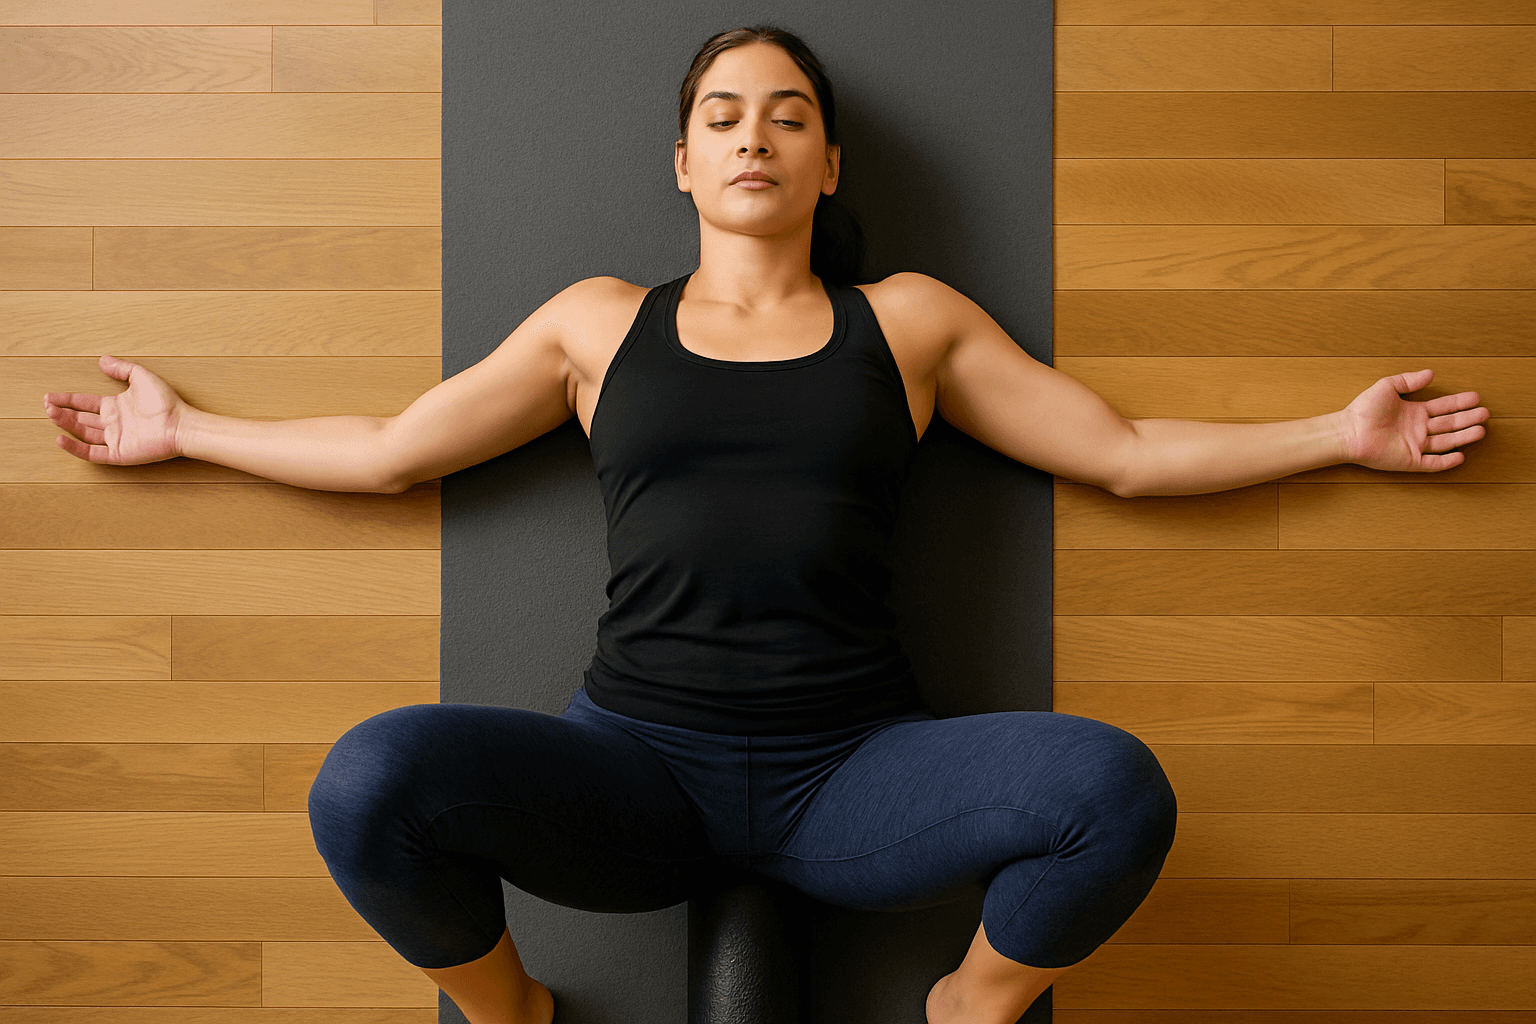
Setup: Place the roller on the floor lengthwise, aligned with your spine. Lie on top of it so the roller runs from your tailbone to the back of your head. Knees bent, feet flat on the floor for balance.
Movement: Let your arms fall out to the sides, palms up, at roughly 45 degrees from your body. Gravity pulls the shoulders open and the chest stretches passively. Hold for 2 to 3 minutes.
Why it works: This position puts the thoracic spine in extension and the shoulders in external rotation - the exact opposite of a slouched desk posture. It is a passive reset that requires zero effort. The longer you hold it, the more the muscles release.
5. Hip Flexor Release on the Roller
The hip flexors drive postural dysfunction from the bottom of the chain. Tight hip flexors tilt the pelvis forward, which rounds the thoracic spine in compensation. While the static back position is the gold standard for hip flexor release, the foam roller can address the TFL and rectus femoris component directly.
Setup: Lie face down with the roller positioned across the front of one hip, just below the hip bone. Support yourself on your forearms.
Movement: Slowly roll from the hip crease to mid-thigh, pausing on any restricted spots for 20 to 30 seconds. Keep your core engaged so the lower back does not arch excessively.
Time: 60 to 90 seconds per side.
The 5-Minute Foam Roller Posture Routine
In order:
- Thoracic extension - 2 minutes (10 to 12 reps across 3 positions)
- Lat release - 1 minute per side
- Chest opener - hold for 1 minute (or longer if you have time)
That is the core routine. Add the upper back release and hip flexor release when you have an extra 2 to 3 minutes. The thoracic extension and chest opener are the highest-value exercises and should never be skipped.
Free - 60 seconds
Not sure which program you need?
Take the free posture quiz and get a personalized recommendation based on your pain and goals.
Common Mistakes
Rolling the lower back. The lumbar spine should never go over a foam roller. If your lower back hurts, the solution is upstream - tight hip flexors and a locked thoracic spine force the lumbar spine to compensate. Fix those and the lower back calms down.
Going too fast. Fast rolling is a massage, not a mobilization. Corrective foam roller work is slow and deliberate. Each position should be held and worked through, not rolled over at speed.
Only using the roller for soreness. Most people reach for the foam roller when something hurts and put it away when the pain fades. For posture correction, the roller should be a daily tool regardless of how you feel. The effects are cumulative.
Next Steps
The foam roller addresses the thoracic component of posture, but lasting correction requires addressing the full chain. If your rounded shoulders are driven by chest tightness and thoracic restriction, the roller is your best starting point. If the issue extends to forward head posture or anterior pelvic tilt, you need corrective exercises that target those regions too.
Take the free posture quiz to find out which patterns are driving your posture, or try the AI posture check to see your alignment and get personalized recommendations. The corrective programs build all of these exercises into structured sequences designed for your specific pattern.

Mike Boshnack
Corrective Exercise Specialist · Posture Guy Mike
Mike Boshnack grew up skateboarding and surfing, trained MMA, and rode road bikes competitively. A shoulder injury put him on a path to discover corrective exercise. He has since helped thousands of people fix the structural patterns causing their pain, without surgery or passive treatments.
Keep Reading
Corrective Method
Why Your Ankles Are Stiff (And How They're Wrecking Your Squat and Your Posture)
4 min read
Corrective Method
Pigeon Pose for Hip Pain: What It Actually Releases and What It Misses
4 min read
Corrective Method
Side Plank for Posture: Fix the Lateral Weakness Behind Your Hip Shift
4 min read
Related Conditions
Free tool
See where your posture stands right now.
Upload a photo and get an instant AI-powered posture analysis with personalized recommendations. Free, no account required.
Try the Free Posture CheckTake the next step
Fix the structural root cause, not just the symptom.
Mike's programs apply this corrective method to your specific condition. No gym, no equipment. Just a floor and 15 minutes. Buy once, own forever.
Discussion
Discussion is a Pro member feature. Visit the community for more.