
Why This Exercise Matters for Posture
The glute bridge is one of the most prescribed exercises in corrective work, and for good reason. It directly addresses the muscle that has the single biggest impact on pelvic position, which in turn affects the entire spine above it.
Here is the chain: your glutes are the primary controllers of pelvic tilt. When they are strong and activated, they hold the pelvis in a neutral position. When they are weak or neurologically inhibited, the pelvis tips forward into anterior pelvic tilt. That forward tilt arches the lower back, compresses the lumbar facet joints, and starts a cascade of compensation - the thoracic spine rounds to counterbalance, the head shifts forward, and the entire postural chain degrades.
Sitting is what switches the glutes off. When you sit, the glutes are in a lengthened, unloaded position for hours at a time. The nervous system responds by reducing their resting activation level - a process called reciprocal inhibition. The hip flexors on the front of the hip are shortened and dominant, and the nervous system turns the opposing glutes down to avoid a muscular tug-of-war.
The result: you stand up from a chair and your glutes are neurologically offline. The hamstrings and lower back compensate as primary hip extensors. This is why so many people have lower back pain that no amount of back stretching or core work resolves - the problem is not the back, it is the glutes not doing their job.
The glute bridge fixes this by retraining the neuromuscular connection between the brain and the glutes. For the full exercise page, visit the glute bridge exercise breakdown.
Step-by-Step Form
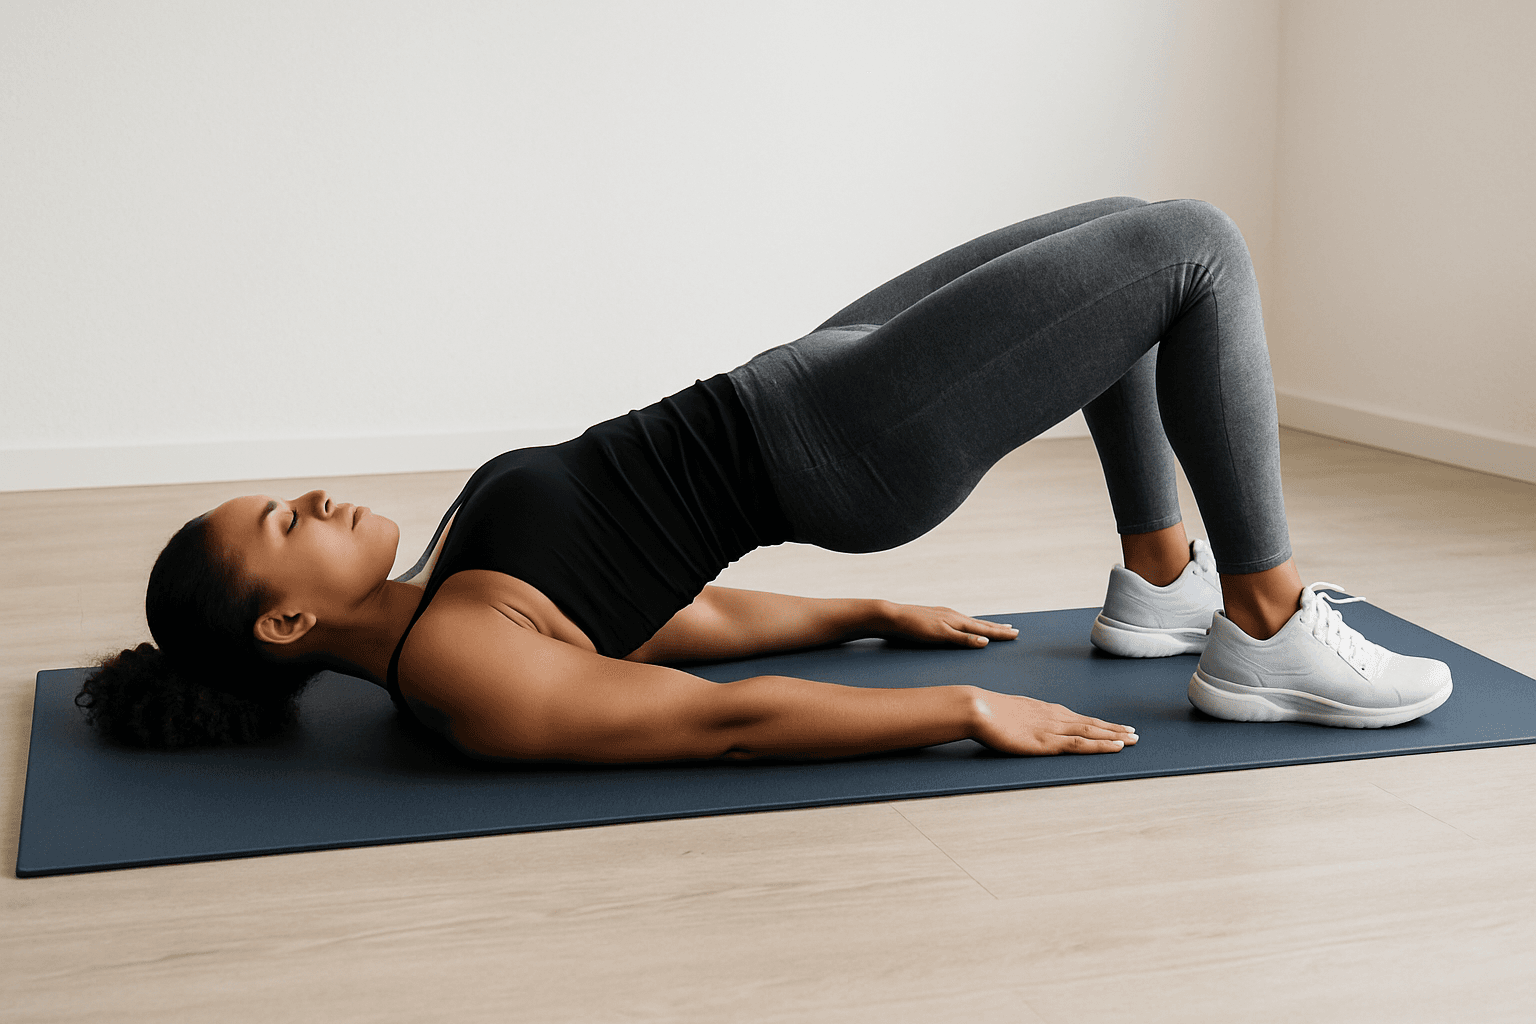
Lie on your back with your knees bent, feet flat on the floor, hip-width apart. Your feet should be close enough to your hips that you can almost touch your heels with your fingertips. Arms at your sides, palms down.
The setup cue that changes everything: drive through your heels.
Before you lift, shift your weight into your heels. You should be able to wiggle your toes off the floor. This single adjustment changes which muscles do the work. Driving through the toes recruits the quadriceps and hamstrings. Driving through the heels recruits the glutes.
Now lift: squeeze the glutes first, then drive the hips toward the ceiling. Rise until your body forms a straight line from shoulders to knees. Do not go higher - hyperextending the lower back at the top shifts the load from the glutes to the lumbar spine and is the most common form mistake.
At the top: Hold for 3 to 5 seconds. Actively squeeze the glutes as hard as you can. Think about tucking the tailbone slightly under (posterior pelvic tilt) rather than pushing the hips as high as possible. The goal is maximum glute contraction, not maximum height.
Lower slowly over 2 to 3 seconds. Do not just drop back to the floor - the eccentric phase builds strength and control.
Repeat for 12 to 15 reps. Rest 30 seconds between sets. Do 3 sets.
The Common Mistakes
Feeling It in the Hamstrings
This is the number one complaint: "I feel glute bridges in my hamstrings, not my glutes." It is also the most important signal the exercise can give you, because it tells you the glutes are not firing.
Fixes: Drive through the heels (not toes). Squeeze the glutes before initiating the lift. Bring the feet slightly closer to the hips, which reduces the hamstring lever arm. And reduce the range of motion - a smaller bridge where you can actually feel the glutes is better than a full bridge where the hamstrings do the work.
Hyperextending at the Top
Pushing the hips as high as possible shifts the extension from the hips to the lumbar spine. The lower back arches, the facet joints compress, and the glutes actually reduce their activation because the hip joint has moved past the point where they are the primary mover.
The fix: stop the bridge when your body reaches a straight line from shoulders to knees. No higher. The squeeze at the top should come from the glutes pulling the pelvis into a slight tuck, not from the spine arching.
Rushing the Reps
Speed kills glute activation. When you bridge fast, momentum does most of the work and the nervous system does not learn to recruit the glutes. Slow the lift to 2 seconds up, hold 3 to 5 seconds at the top, 2 to 3 seconds down. Controlled reps build the neuromuscular connection that fast reps skip.
Free - 60 seconds
Not sure which program you need?
Take the free posture quiz and get a personalized recommendation based on your pain and goals.
Progressions
Level 1: Two-Leg Glute Bridge (Baseline)
This is where everyone starts. Master 3 sets of 15 with a 5-second hold at the top, feeling the glutes as the primary mover, before progressing.
Level 2: Marching Glute Bridge
Bridge up to the top position and hold. From here, lift one foot off the floor, driving the knee toward the ceiling. Return the foot and lift the other. Alternate for 8 to 10 reps per side while maintaining the bridge position.
This challenges single-leg glute stability without requiring full single-leg strength. It is the critical intermediate step that most people skip. If your hips drop or rotate when you lift one foot, you are not ready for single-leg bridges.
Level 3: Single-Leg Glute Bridge
Bridge up on one leg with the other leg extended or held at 90 degrees. This doubles the load on the working glute and exposes any asymmetry between sides. The single-leg glute bridge is the gold standard for corrective glute work because it trains each side independently.
Start with 3 sets of 8 per side with a 3-second hold. Progress to 3 sets of 12 per side.
Level 4: Elevated Single-Leg Bridge
Place the working foot on a low step or bench (6 to 12 inches) and perform single-leg bridges. The increased range of motion loads the glute through a longer muscle length, building strength in the deeper ranges where most people are weakest.
When and How Often
For corrective purposes, daily glute bridges for the first 4 to 6 weeks produce the fastest reactivation. After that, 3 to 4 times per week maintains the neuromuscular connection.
The best time is in the morning before prolonged sitting begins, and again in the evening to reactivate after a day of sitting. Two sessions of 3 sets takes about 8 minutes total.
If you are using glute bridges as part of a corrective program for lower back pain or anterior pelvic tilt, pair them with hip flexor stretching. Releasing the tight hip flexors first allows the glutes to fire more effectively. The combination of hip flexor release plus glute activation is the most powerful corrective pairing for pelvic position.
The Bigger Picture
The glute bridge is not a glamorous exercise. It does not look impressive and it does not require any equipment. But it addresses the single most common muscular dysfunction in adults who sit for a living, and it does it precisely and safely.
If you want glute bridges programmed into a structured corrective sequence with hip flexor work, core stability, and full postural correction, the Anterior Pelvic Tilt Fix program includes them as a core component. Not sure if your glutes are the issue? Take the free posture quiz to find out where your postural chain is breaking down.

Mike Boshnack
Corrective Exercise Specialist · Posture Guy Mike
Mike Boshnack grew up skateboarding and surfing, trained MMA, and rode road bikes competitively. A shoulder injury put him on a path to discover corrective exercise. He has since helped thousands of people fix the structural patterns causing their pain, without surgery or passive treatments.
Keep Reading
Corrective Method
Why Your Ankles Are Stiff (And How They're Wrecking Your Squat and Your Posture)
4 min read
Corrective Method
Pigeon Pose for Hip Pain: What It Actually Releases and What It Misses
4 min read
Corrective Method
Side Plank for Posture: Fix the Lateral Weakness Behind Your Hip Shift
4 min read
Related Programs
Free tool
See where your posture stands right now.
Upload a photo and get an instant AI-powered posture analysis with personalized recommendations. Free, no account required.
Try the Free Posture CheckTake the next step
Fix the structural root cause, not just the symptom.
Mike's programs apply this corrective method to your specific condition. No gym, no equipment. Just a floor and 15 minutes. Buy once, own forever.
Discussion
Discussion is a Pro member feature. Visit the community for more.