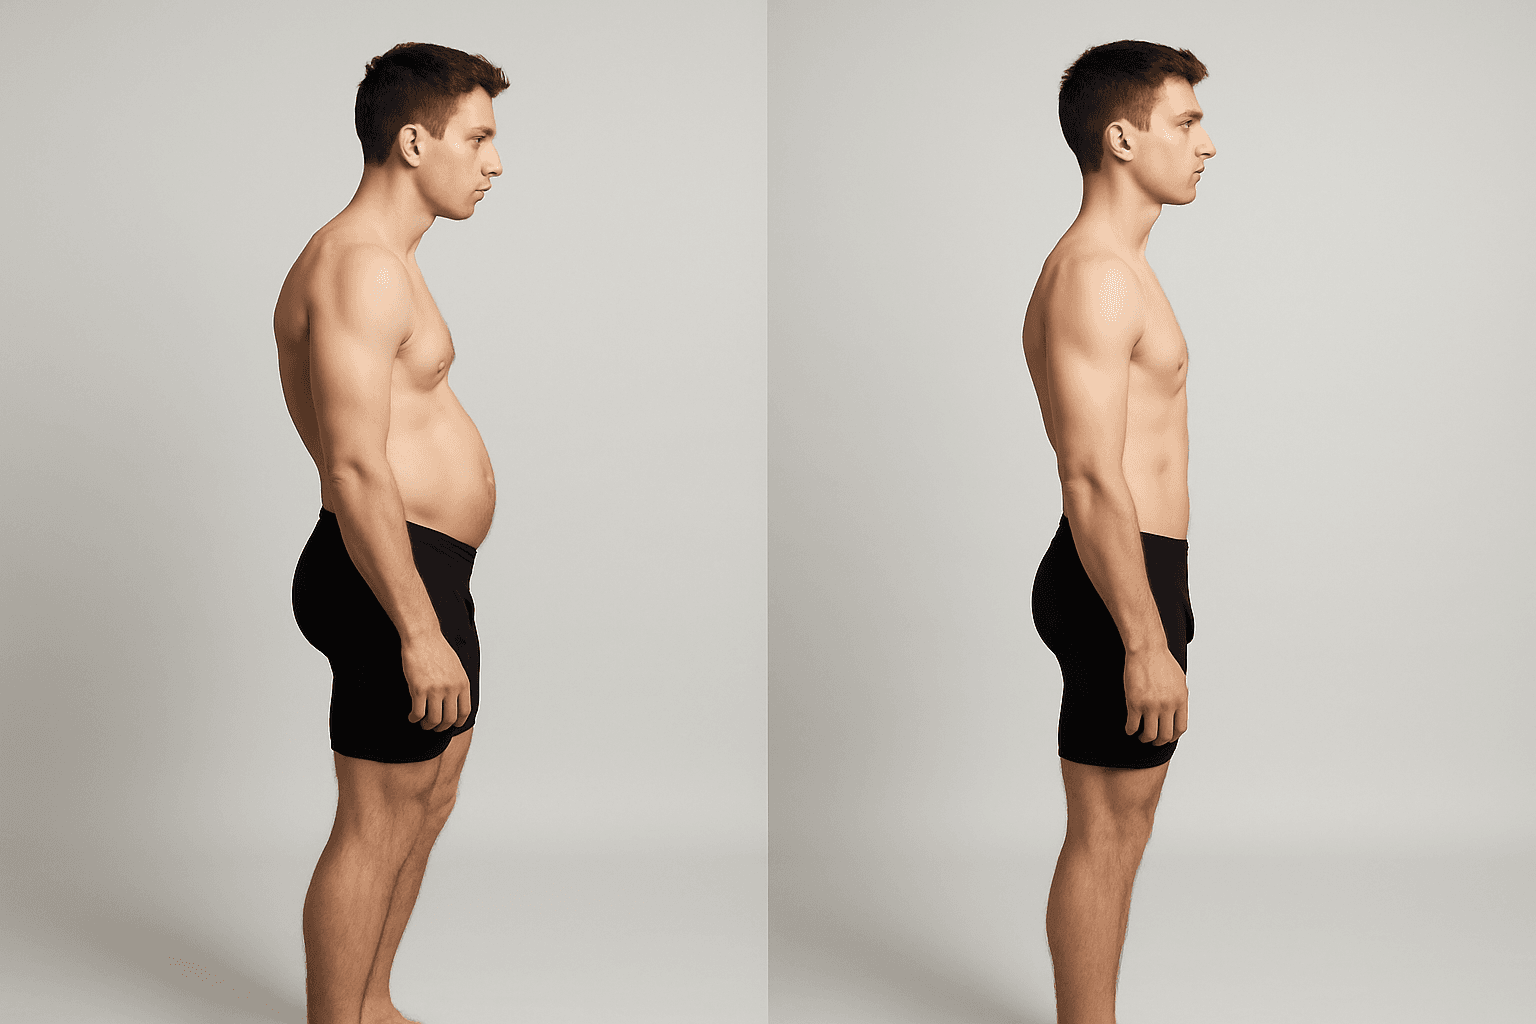
What Anterior Pelvic Tilt Actually Is
Anterior pelvic tilt is a postural dysfunction where the front of the pelvis drops downward and the back of the pelvis rises upward. Picture a bowl of water sitting on top of your hips. In a neutral pelvis, the water stays level. In anterior pelvic tilt, the water spills out the front.
This forward tipping of the pelvis has a cascading effect on the entire body. The lower back is forced into an exaggerated arch (hyperlordosis). The abdomen pushes forward. The glutes lose their ability to fire efficiently. And the body compensates up and down the chain, often producing pain in the lower back, hips, knees, or all three.
Here is the critical point: anterior pelvic tilt is not a structural problem. The bones are fine. The pelvis is being pulled into a bad position by a muscle imbalance, and that imbalance is almost entirely created by how we live. Specifically, by how much we sit.
For a full breakdown of the condition, visit the Anterior Pelvic Tilt condition page.
The Self-Test: Do You Have It?
You can check in under 30 seconds.
**The Wall Test**
Stand with your back against a wall. Your heels should be about 4 inches from the baseboard, and your upper back and the back of your head should touch the wall. Now check the space between your lower back and the wall.
- **If only your fingers fit** (roughly 1 to 1.5 inches of space), your pelvis is in a healthy neutral position. - **If your entire hand slides through easily** (3+ inches of space), you have anterior pelvic tilt.
You can also stand sideways in front of a mirror. Look at the angle of your belt line. If it slopes noticeably downward toward the front, the pelvis is tilting forward.
Most people who sit for more than 5 or 6 hours a day have some degree of anterior pelvic tilt. It is arguably the most common postural dysfunction in the developed world.
Why It Happens: The Sitting Mechanism
Anterior pelvic tilt is created by two muscle groups going in opposite directions at the same time.
Hip Flexors Shorten
When you sit, your hip flexors (primarily the psoas and iliacus) are held in a shortened position. Sit for 8 hours a day, 5 days a week, for years, and these muscles adapt. They physically shorten and tighten, developing increased resting tone even when you stand up.
Because the hip flexors attach to the front of the pelvis and the lumbar spine, their increased tension pulls the front of the pelvis downward. This is the primary mechanical driver of the tilt.
Glutes Shut Off
While the hip flexors are shortening, the glutes are stretching and going dormant. In a seated position, the glutes are lengthened and completely inactive. Over time, the nervous system reduces its signal to these muscles. They are not just weak - they are inhibited. The brain has turned down the volume on them.
The glutes are supposed to be the primary counterbalance to the hip flexors. They pull the back of the pelvis downward, keeping it level. When they stop working, the hip flexors win the tug-of-war unopposed.
The Core Disengages
With the pelvis tipped forward and the lower back arched, the deep core muscles (transversus abdominis and internal obliques) cannot do their job. They are designed to stabilize a neutral spine. When the spine is in hyperlordosis, they are mechanically disadvantaged and the body relies on the lower back muscles instead. This is why anterior pelvic tilt and chronic lower back pain are so closely linked.
Why Stretching Alone Does Not Work
This is where most people go wrong. They feel tight hip flexors, they stretch them, they feel temporary relief, and then the tightness comes back within hours. The cycle repeats indefinitely.
The reason is simple: stretching addresses the tight side of the equation but does nothing about the weak side. You can temporarily lengthen the hip flexors, but if the glutes are still inhibited and the core is still disengaged, nothing is actively holding the pelvis in its corrected position. The hip flexors tighten right back up because they are still the dominant force.
Lasting correction requires addressing both sides simultaneously: release what is tight, and reactivate what is weak.
The Corrective Sequence
This is the approach I use with every anterior pelvic tilt case. The exercises are done in a specific order because each step creates the conditions for the next one to work.
Step 1: Static Back (5-10 minutes)
Lie on your back with your calves resting on a chair or ottoman so your hips and knees are both at approximately 90 degrees. Arms out to the sides, palms up. Breathe slowly and let your lower back settle toward the floor.
**Why it comes first:** This position completely deactivates the hip flexors. You cannot effectively stretch or strengthen anything while the hip flexors are still firing and pulling the pelvis forward. Static back shuts them down and allows the pelvis to begin resetting to neutral. It is the foundation of the entire correction.
For a detailed guide on this position, read the Static Back exercise page.
Step 2: Supine Groin Stretch (5-15 minutes per side)
Lie on your back with one leg up on a chair (hip and knee at 90 degrees) and the other leg extended straight out on the floor. Let the extended leg relax completely. You should feel a gradual release in the front of the hip on the extended side.
**Why it matters:** This is the most effective hip flexor release in corrective exercise. Unlike a kneeling hip flexor stretch where the hip flexors are partially active to keep you upright, the supine groin stretch puts you in a fully supported position where the hip flexor can release passively. The key is time. This is not a 30-second stretch. The psoas needs 5 to 15 minutes to fully release its holding pattern.
Learn the full technique at the Supine Groin Stretch exercise page.
Step 3: Glute Bridges (3 sets of 10-15 reps)
Lie on your back, knees bent, feet flat on the floor hip-width apart. Press through your heels and lift your hips until your body forms a straight line from knees to shoulders. Squeeze the glutes hard at the top. Hold for 2 to 3 seconds, then lower slowly.
**Why this timing matters:** The glute bridges come after the hip flexor release for a critical reason. When the hip flexors are tight and overactive, they inhibit the glutes through a mechanism called reciprocal inhibition. The nervous system suppresses the opposing muscle group. By releasing the hip flexors first, you remove that inhibition and the glutes can actually fire when you ask them to.
If your glutes cramp during bridges, that is actually a good sign. It means muscles that have been dormant are waking up and working harder than they are accustomed to.
Step 4: Abdominal Engagement (Dead Bugs or Supine Pelvic Tilts)
Lie on your back with knees bent. Flatten your lower back into the floor by gently engaging your deep core. From this position, perform dead bugs (alternating arm and leg extensions while maintaining the flat back) or simple pelvic tilts.
**Why it comes last:** The core exercises lock in the correction. With the hip flexors released and the glutes firing, the core can now stabilize the pelvis in its new, more neutral position. This is what prevents the hip flexors from pulling the pelvis back into the tilt within hours.
Timeline: What to Expect
Consistency matters more than intensity. Fifteen to twenty minutes daily produces better results than an hour twice a week.
**Week 1-2:** Reduced lower back tightness. The lower back muscles that have been overworking to compensate for the tilt begin to release. Many people notice less end-of-day back pain within the first week.
**Week 2-4:** Improved glute activation. You start feeling the glutes engage during daily activities like walking and climbing stairs. The dead-butt feeling from sitting all day becomes less pronounced.
**Week 4-6:** Visible improvement in pelvic position. The lower back arch is less exaggerated, the abdomen appears flatter (not from fat loss, but from the pelvis moving to neutral), and the overall silhouette begins to change.
**Week 6-12:** Lasting postural change. The new muscle balance becomes the default. The hip flexors maintain a healthier resting length, the glutes stay active, and the pelvis holds its position without conscious effort.
What Makes This Stick
The difference between temporary relief and lasting correction comes down to one thing: are you only releasing what is tight, or are you also reactivating what is weak?
Stretching the hip flexors gives you a window. Activating the glutes and core within that window is what makes the change permanent. Every time you do the full sequence, you reinforce the new pattern. Over weeks, the nervous system adopts it as the new default.
The Anterior Pelvic Tilt Fix program walks through this entire sequence in structured daily sessions, progressing the difficulty as your body adapts. If you are not sure whether anterior pelvic tilt is your primary issue, start with the free posture quiz to find out what your body needs most.

Mike Boshnack
Corrective Exercise Specialist · Posture Guy Mike
Mike Boshnack grew up skateboarding and surfing, trained MMA, and rode road bikes competitively. A shoulder injury put him on a path to discover corrective exercise. He has since helped thousands of people fix the structural patterns causing their pain, without surgery or passive treatments.
Keep Reading
Related Conditions
Related Programs
Free tool
See where your posture stands right now.
Upload a photo and get an instant AI-powered posture analysis with personalized recommendations. Free, no account required.
Try the Free Posture CheckTake the next step
Fix the structural root cause, not just the symptom.
Mike's programs apply this corrective method to your specific condition. No gym, no equipment. Just a floor and 15 minutes. Buy once, own forever.
Discussion
Discussion is a Pro member feature. Visit the community for more.