

Why Most Posture Advice Fails
Most posture advice boils down to "sit up straight" or "pull your shoulders back." This advice fails because it treats posture as a conscious choice rather than what it actually is: the physical result of muscle balance.
Your body holds itself in whatever position its muscles dictate. If the muscles on the front of your body are short and tight while the muscles on the back are long and weak, no amount of willpower will hold you upright. The moment your attention shifts, the tight muscles win and you slouch right back.
Fixing posture means changing the muscle balance itself. That requires a specific approach: release what is tight, activate what is weak, and do it in an order that allows each step to build on the last.
These 7 exercises, done in this sequence, address the full postural chain from pelvis to skull. They are the most effective corrective exercises I use, and they work because they target the root cause of postural dysfunction, not the symptoms.
Exercise 1: Static Back
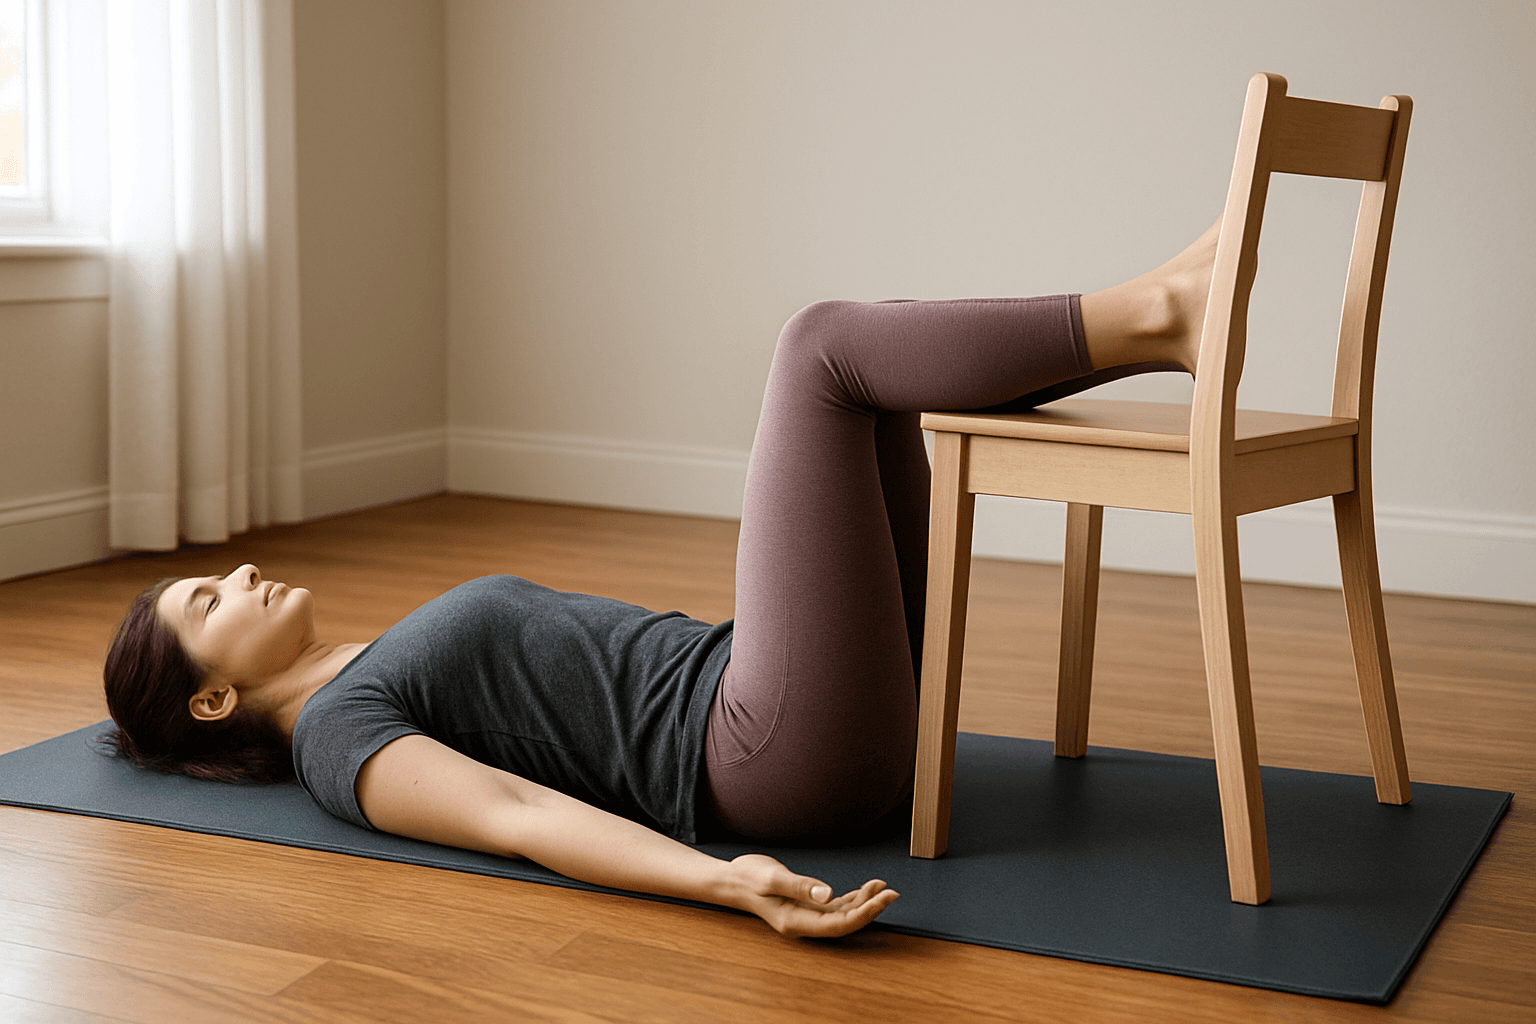
What it does: Deactivates the hip flexors, decompresses the spine, and resets the pelvis toward neutral. This is the foundation exercise that makes everything else work better.
How to do it:
- Lie on your back with your calves resting on a chair, couch, or ottoman.
- Position yourself so your hips and knees are both at approximately 90 degrees.
- Place your arms out to the sides at roughly 45 degrees, palms facing up.
- Breathe slowly and deeply. Let your lower back settle toward the floor.
- Hold for 5 to 10 minutes.
Why it comes first: The hip flexors are the primary driver of anterior pelvic tilt and the downstream postural issues it creates. You cannot effectively correct anything above or below the pelvis while the hip flexors are pulling it out of position. Static back shuts them down completely, giving the pelvis a chance to return to neutral. Every exercise that follows starts from a better foundation because of this reset.
For more detail, read the full Static Back guide.
Exercise 2: Supine Groin Stretch
What it does: Passively releases the psoas and iliacus (the deep hip flexor muscles) more completely than any active stretch.
How to do it:
- Lie on your back with one leg up on a chair (hip and knee at 90 degrees).
- Extend the other leg straight out on the floor. Let it relax completely.
- Keep your arms out to the sides, palms up.
- Hold for 5 to 15 minutes per side.
Why it matters: The static back position deactivates the hip flexors. The supine groin stretch takes the next step and actually lengthens them. The fully supported position means the psoas can release passively, without any compensatory muscle activation. This is critical because the psoas does not respond well to aggressive active stretching. It guards against being forced and tightens up. The passive, sustained hold is what produces lasting length change.
Learn the full technique at the Supine Groin Stretch exercise page.
Free - 60 seconds
Not sure which program you need?
Take the free posture quiz and get a personalized recommendation based on your pain and goals.
Exercise 3: Thoracic Extension Over Foam Roller
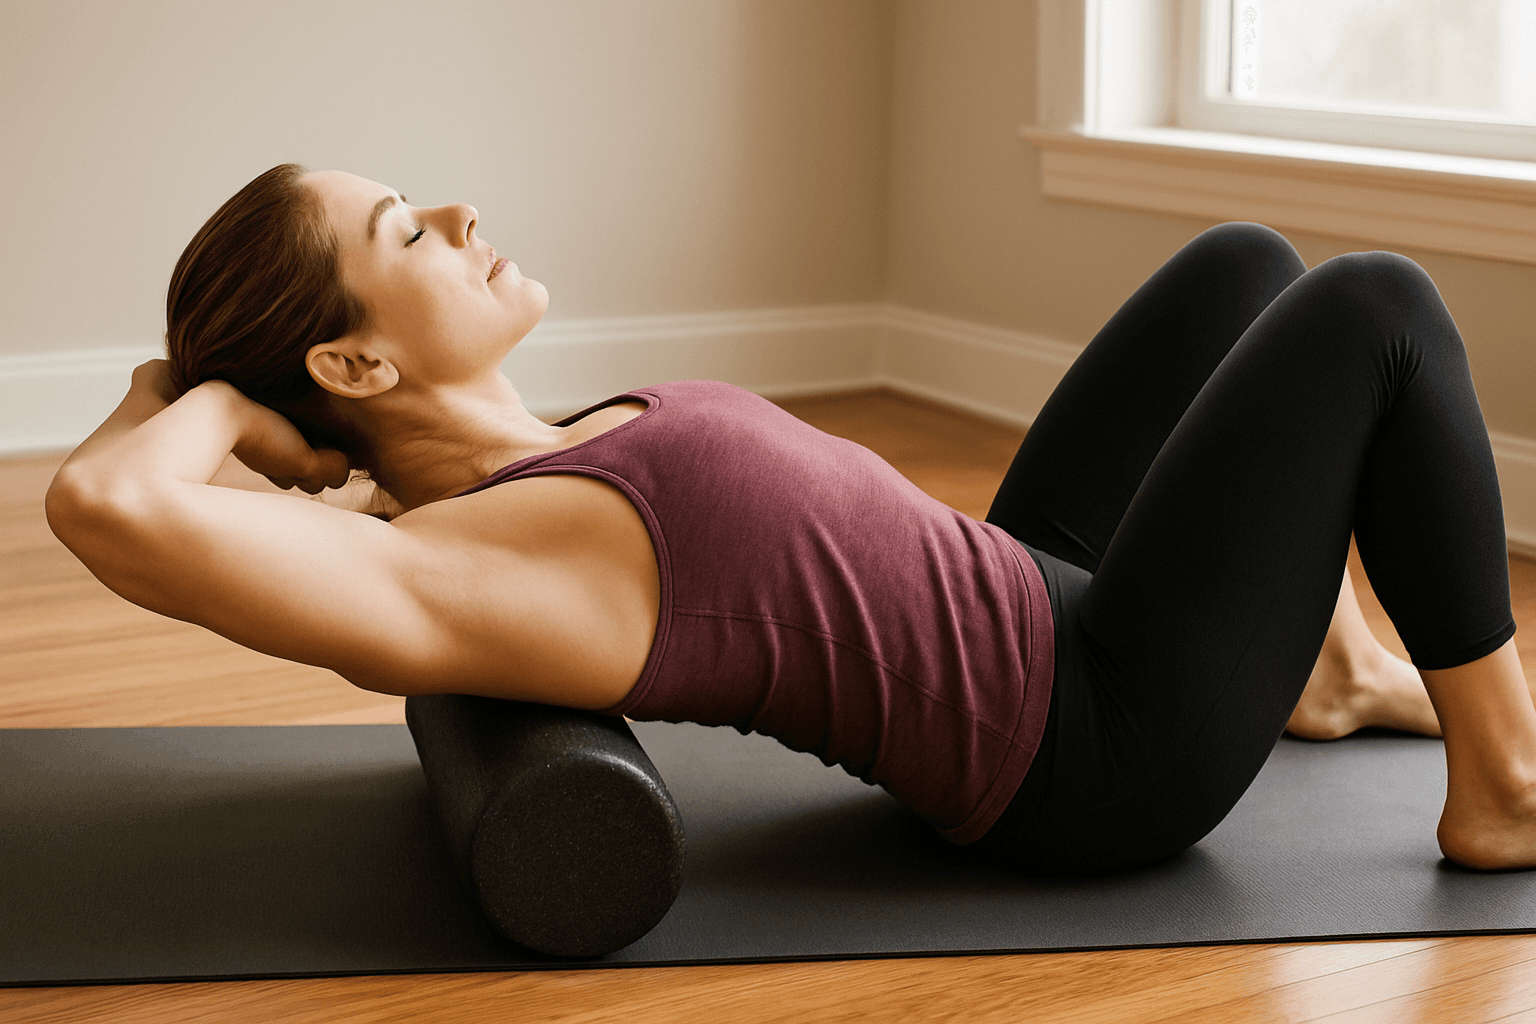
What it does: Restores extension range of motion in the mid-back (thoracic spine), which is the area that rounds forward in kyphosis and desk posture.
How to do it:
- Place a foam roller horizontally across the floor.
- Sit in front of it and lean back so the roller sits across your mid-back (roughly at the bottom of your shoulder blades).
- Support your head with your hands behind your neck.
- Keeping your hips on the ground, gently extend your upper back over the roller.
- Hold for 5 to 10 seconds, then reposition the roller up or down an inch and repeat.
- Work through the entire thoracic spine, from the bottom of the shoulder blades to the base of the neck.
- Spend 2 to 3 minutes total.
Why it matters: The thoracic spine is designed to extend (straighten upward). When it loses that ability, the body cannot achieve an upright posture regardless of how strong the back muscles are. You have to restore the range before you can strengthen the muscles that hold it. This exercise directly mobilizes the stiff segments and re-teaches the thoracic spine to extend.
Exercise 4: Prone Cobra
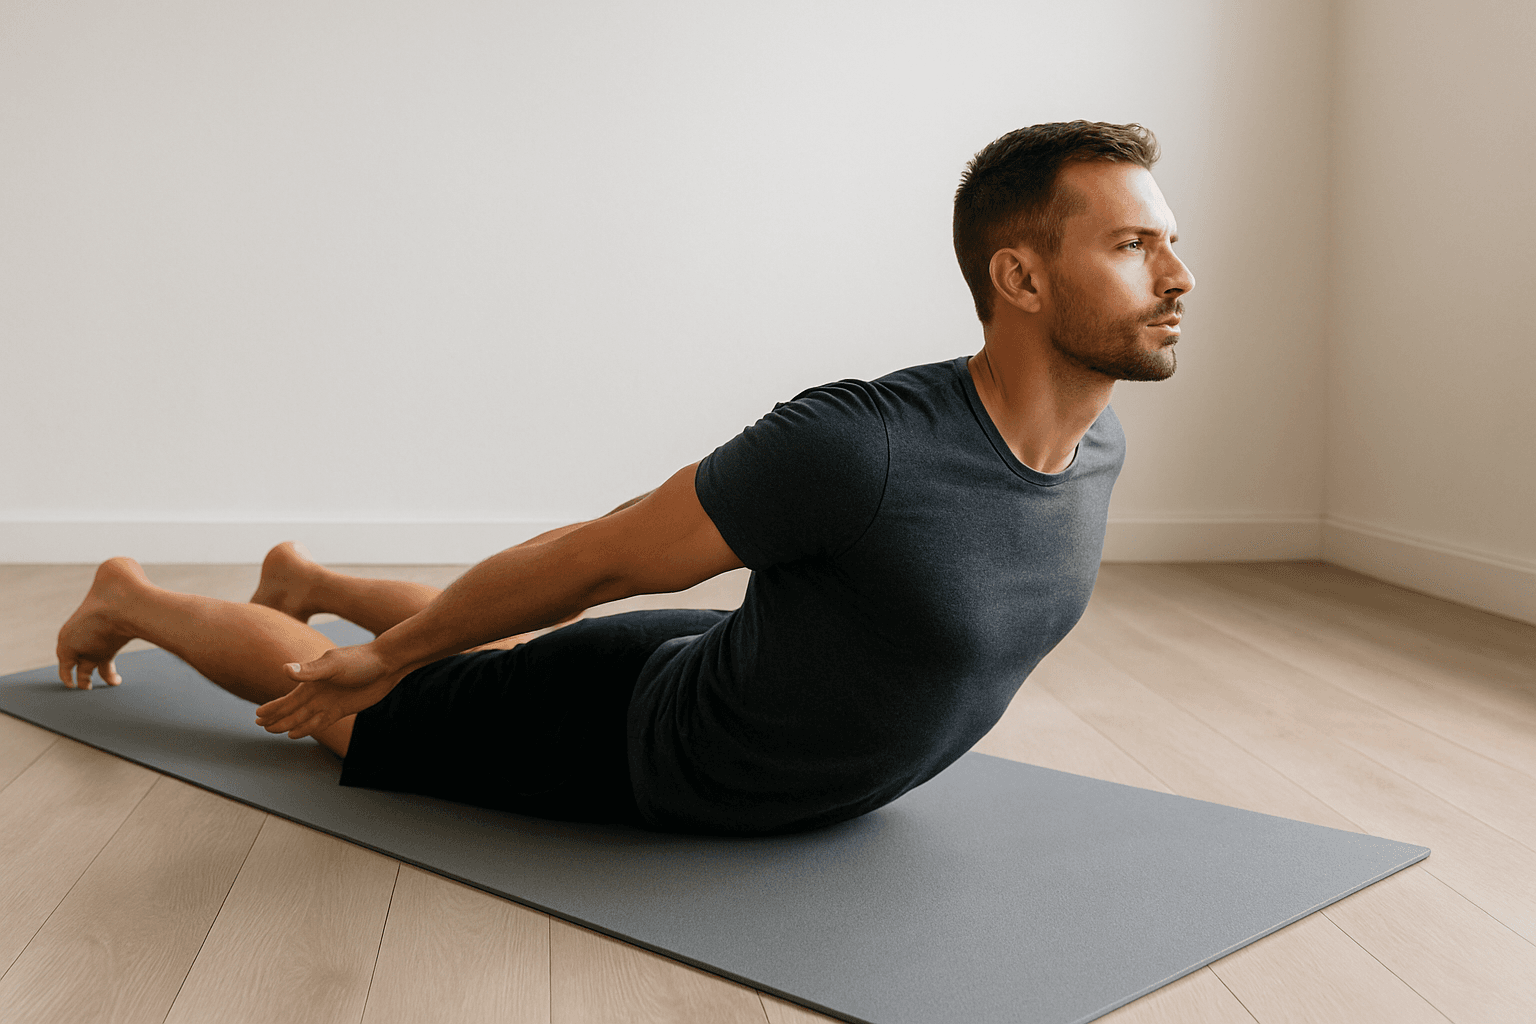
What it does: Activates the posterior chain - the thoracic extensors, mid and lower trapezius, rhomboids, and posterior deltoids. These are the muscles responsible for holding your upper back upright and your shoulders back.
How to do it:
- Lie face down with your arms at your sides, palms facing down.
- Pinch your shoulder blades together and lift your chest slightly off the floor.
- Simultaneously rotate your palms to face outward (external rotation of the shoulders).
- Lift only as high as you can without using your lower back. The work should be between your shoulder blades.
- Hold for 10 to 15 seconds. Lower slowly.
- Repeat 5 to 8 times.
Why it matters: After releasing the tight front of the body and mobilizing the thoracic spine, you need to activate the muscles that were switched off. The prone cobra directly targets the muscles that hold the upper back upright and the shoulders in proper position. These muscles have been lengthened and inhibited by forward posture, and this exercise turns them back on. The external rotation component is especially important because it counteracts the internal rotation pattern that develops from desk work.
Exercise 5: Glute Bridge
What it does: Activates the glutes, which are the primary stabilizers of the pelvis and the direct counterbalance to the hip flexors.
How to do it:
- Lie on your back with your knees bent and feet flat on the floor, hip-width apart.
- Press through your heels and lift your hips until your body forms a straight line from knees to shoulders.
- Squeeze the glutes hard at the top. Hold for 2 to 3 seconds.
- Lower slowly. Do not just drop.
- Perform 3 sets of 10 to 15 reps.
Why it matters: The glutes go dormant from sitting. Through reciprocal inhibition, tight hip flexors suppress glute activation even further. By this point in the sequence, the hip flexors have been deactivated (static back) and released (supine groin stretch), which removes the reciprocal inhibition. The glutes can now fire properly for the first time. The bridge teaches them to engage and hold the pelvis in its corrected position.
The timing in the sequence is not optional. Glute bridges done before hip flexor release are significantly less effective because the hip flexors are still inhibiting them.
Exercise 6: Dead Bug
What it does: Trains the deep core (transversus abdominis, internal obliques) to stabilize the spine in anti-extension, which is the pattern needed to prevent the pelvis from tipping forward and the lower back from arching.
How to do it:
- Lie on your back with both arms reaching toward the ceiling and both legs in a tabletop position (hips and knees at 90 degrees).
- Press your lower back firmly into the floor.
- Slowly extend your right arm overhead and your left leg straight out, lowering both toward the floor.
- Only go as far as you can while keeping your lower back flat on the floor.
- Return to the starting position and repeat on the opposite side.
- Perform 3 sets of 8 to 10 reps per side.
Why it matters: The dead bug locks in the pelvic correction. With the hip flexors released and the glutes activated, the core now needs to learn to stabilize the pelvis in its new, neutral position. The dead bug trains this exact pattern without any spinal flexion loading, making it safe for anyone, including people with back pain. It is the exercise that prevents the correction from being temporary.
Read the full guide in the Dead Bug exercise breakdown or the in-depth Dead Bug exercise guide.
Exercise 7: Chin Tuck
What it does: Reactivates the deep cervical flexors that hold the head over the shoulders, and deactivates the overactive suboccipital muscles that pull the head forward.
How to do it:
- Stand or sit with your back against a wall.
- Without tilting your head up or down, glide your head straight backward until the back of your skull touches or approaches the wall.
- Think of making a "double chin." The movement is a horizontal retraction, not a downward nod.
- Hold for 5 seconds. Return slowly.
- Perform 10 to 15 reps, 2 to 3 sets.
Why it matters: Forward head posture is the final link in the postural chain. The head migrates forward to compensate for thoracic rounding, which compensates for pelvic tilt. By this point in the sequence, the pelvis is corrected, the thoracic spine is mobilized and the back muscles are activated, and the core is stabilizing the trunk. The chin tuck addresses the last piece: the position of the head on the neck. It comes last because correcting the chain below it first means the head has less reason to sit forward in the first place.
For the full breakdown, visit the Chin Tuck exercise page or read the complete Chin Tuck exercise guide.
What Order to Do Them In
The order listed above is the order you should follow, and it is not arbitrary. Each exercise creates the conditions that make the next one more effective.
Phase 1 - Release and Reset (Exercises 1-3): Deactivate overactive muscles, release shortened tissues, and restore lost range of motion. This is the "make space" phase.
Phase 2 - Activate and Stabilize (Exercises 4-6): Wake up the muscles that have been switched off and train them to hold the corrected positions. This is the "fill the space" phase.
Phase 3 - Refine (Exercise 7): Address the most specific postural correction at the top of the chain once the foundation below it has been set.
If you skip the release phase and go straight to strengthening, the tight muscles block the movement and the weak muscles cannot activate properly. If you only release without activating, the tight muscles tighten right back up because nothing is holding the correction. Both phases are necessary, and the order determines whether each exercise does its job.
How Long Until You See Results
Week 1-2: Reduced pain and tension. Lower back tightness decreases, neck tension eases, and end-of-day discomfort noticeably drops. These are the fastest changes because they reflect immediate release of chronic holding patterns.
Week 2-4: Improved body awareness. You start catching yourself slouching and self-correcting without thinking about it. Muscles that were dormant (glutes, mid-back, deep core) begin engaging during daily activities.
Week 4-8: Visible postural change. Your standing posture shifts measurably. The forward head position reduces, the shoulders sit farther back, the lower back arch normalizes. Other people may start commenting that you look taller or more upright.
Week 8-12: The new posture becomes your default. The nervous system has adopted the corrected muscle balance as its baseline. You hold good posture without thinking about it because the muscles supporting it are now stronger than the muscles pulling against it.
Fifteen to twenty minutes daily is enough. Consistency is the variable that matters most. A short daily session produces better results than a long session done a few times a week because the nervous system needs daily repetition to rewire its default patterns.
The Bigger Picture
These 7 exercises are not random selections. They are a system. Each one addresses a specific layer of the postural chain, and together they correct the entire pattern from the ground up.
If you want these exercises programmed into structured daily sessions with built-in progression, the programs at Posture Guy Mike do exactly that. The Standing Posture program is the best starting point for full-body correction.
If you are not sure which area of your posture needs the most attention, take the free posture quiz. It takes 2 minutes and tells you exactly where your imbalances are and which program addresses them.
And if you want a quick assessment of your current posture right now, try the free posture check to see where you stand.

Mike Boshnack
Corrective Exercise Specialist · Posture Guy Mike
Mike Boshnack grew up skateboarding and surfing, trained MMA, and rode road bikes competitively. A shoulder injury put him on a path to discover corrective exercise. He has since helped thousands of people fix the structural patterns causing their pain, without surgery or passive treatments.
Keep Reading
Corrective Method
Why Your Ankles Are Stiff (And How They're Wrecking Your Squat and Your Posture)
4 min read
Corrective Method
Pigeon Pose for Hip Pain: What It Actually Releases and What It Misses
4 min read
Corrective Method
Side Plank for Posture: Fix the Lateral Weakness Behind Your Hip Shift
4 min read
Free tool
See where your posture stands right now.
Upload a photo and get an instant AI-powered posture analysis with personalized recommendations. Free, no account required.
Try the Free Posture CheckTake the next step
Fix the structural root cause, not just the symptom.
Mike's programs apply this corrective method to your specific condition. No gym, no equipment. Just a floor and 15 minutes. Buy once, own forever.
Discussion
Discussion is a Pro member feature. Visit the community for more.